Data Population
NOTE: The AgilePoint Data Population only supports InfoPath and ASP.NET based process models where a schema is associated.
To setup the Data Population:
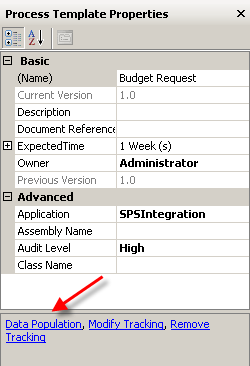
- Click the Data Population link in the Process Templates Properties pane.
The Connecting to Server window appears.
- Select the Logon type and click OK.
The Data Population Configuration window appears. This windows allows you to select either a “Basic” or “Advanced” way of configuring the repository and setting up the mapping for data population.
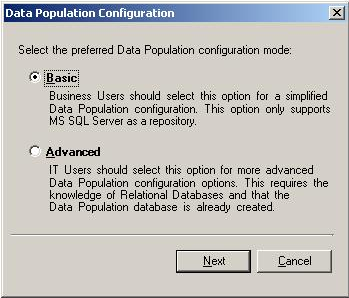
- Do one of the following:
• Select “Basic” for a more user friendly way of configuring the data population. This method has limited functionality as compared to the “Advanced” method.
• Select “Advanced” for a more advanced method of configuring the data population. This option should be used by users who have relational database experience.
If you selected the “Basic” option, the Data Service Configuration window appears.
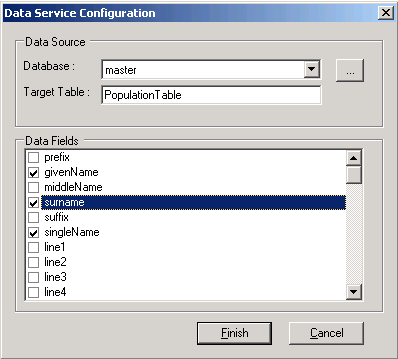
- Click the Ellipses button to populate the database list with all the databases on the server.
- (Optional) Change the Target Table name if desired.
- Select the Data Fields from the forms schema for which to populate data to the database.
- Click Finish.
If you selected the “Advanced” option, the Configuration Repository window appears.
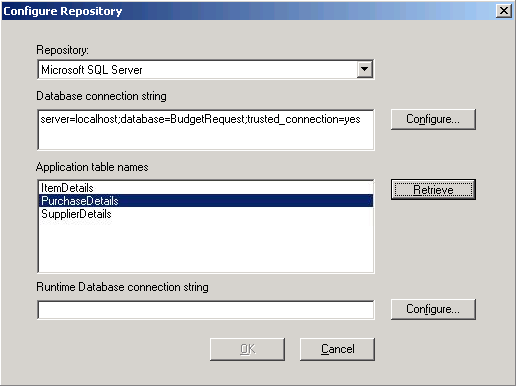
- In the “Repository” field, select either Microsoft SQL Server or Oracle to write the data toa database, or Sharepoint list to write the data to a SharePoint list.
- Do one of the following:
- If you have chose to write the data to a database:
a. In the “Connection String” field, enter the database connection string and click the green arrow to sync with the database.
b. In the “Application Table” field, select the table(s) name(s) for which to populate data.
c. (Optional) In the “Runtime Database connection string” field, enter the database connection string that will be used at runtime.
d. Click OK.
- If you have chose to write data to a SharePoint list
a. In the “Site URL” field, enter the SharePoint Site URL for the list and click the green arrow to sync with the list.
b. In the “List Name” field, select the list(s) name(s) for which to populate data. Also select the Primary Key to be used for each list.
c. (Optional) In the “Runtime Server URL” field, enter the SharePoint site URL that will be used at runtime.
d. Click OK.
The Schema Mapper window appears. The left window pane shows the form’s Schema, the right side shows the database structure.
NOTE: If the selected tables have more than one foreign key reference, an error message is displayed, also if the selection does not contain a master table that is referenced by a detail table, a warning message is displayed. The Repository dialog closes and opens the Schema mapper. If a selected table does not contain a primary key field, an error will be shown.
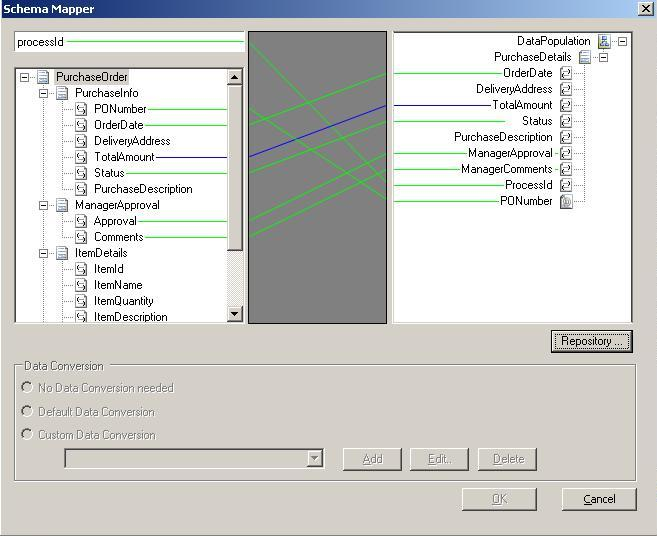
- Map the fields from the form’s schema to the database fields by dragging and dropping from the schema to the database pane. You will see the connection lines appear as shown above. The connection lines may show different colors based on the compatibility of the data types as follows:
- Green: The data type matches.
- Blue: The data type does not match, the system will handle the conversion.
- Red: The data type does not match, custom data conversion is required. In this case, click the Add button and add the custom mapping code as necessary to handle the data conversion.
At runtime, the database is populated with the values of the form fields.
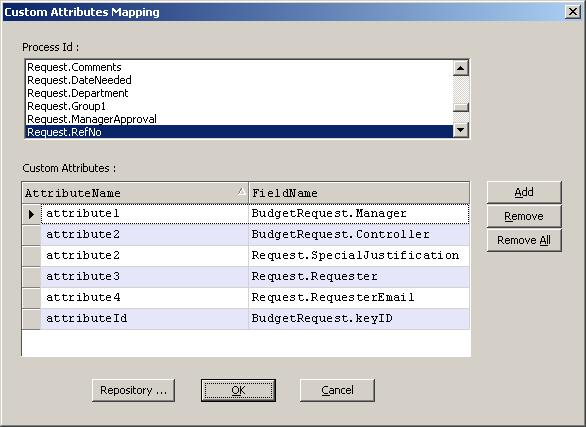
Mapping Custom Attributes to Multiple Tables
The following instructions are a use case for mapping custom attributes to multiple tables.
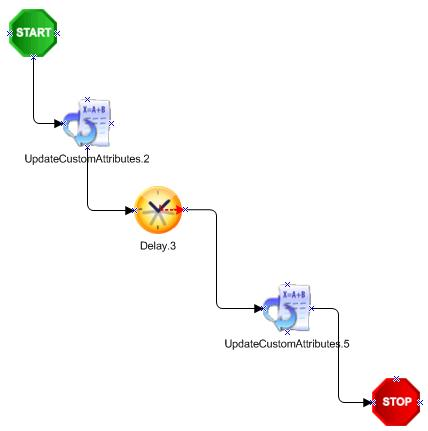
- Create a Generic AgilePoint application without a schema.
- Add a couple of Update Custom Attribute activities to change the Custom Attribute values. Add a Delay shape in between to observe the changes. The AgilePoint process will look something like this:
- Click the Data Population link to open the Configure Repository dialog. Select the Database as Repository and set the Database connection string and click the Connect button to display the list of tables present in the specified database.
- Select the tables that are required and set the Runtime address string (optional), then click OK.
NOTE: All the detail tables are hidden (i.e. not displayed) in the Application table names list box. This is because Detail tables are not supported for custom attribute mapping.
- In the Custom Attributes Mapping window, enter the attribute name in the “AttributeName” column and select the FieldName to which the attribute has to be mapped.
NOTE: All the primary key fields must be mapped to an attribute compulsorily or selected in the Process Id list box, else an error message will be displayed. An attribute can be mapped to more than one field (i.e. One to Many mapping is allowed).